
Printer paper jams stem from glazed or worn EPDM pick-up rollers, obstructed optical flag sensors, foreign debris in the feed chute, swollen paper from tropical humidity, or sticky solenoid clutches. Distinguishing physical paper blockages from false or phantom jam errors requires isolating whether feed mechanics, optical sensors, or clutches failed.
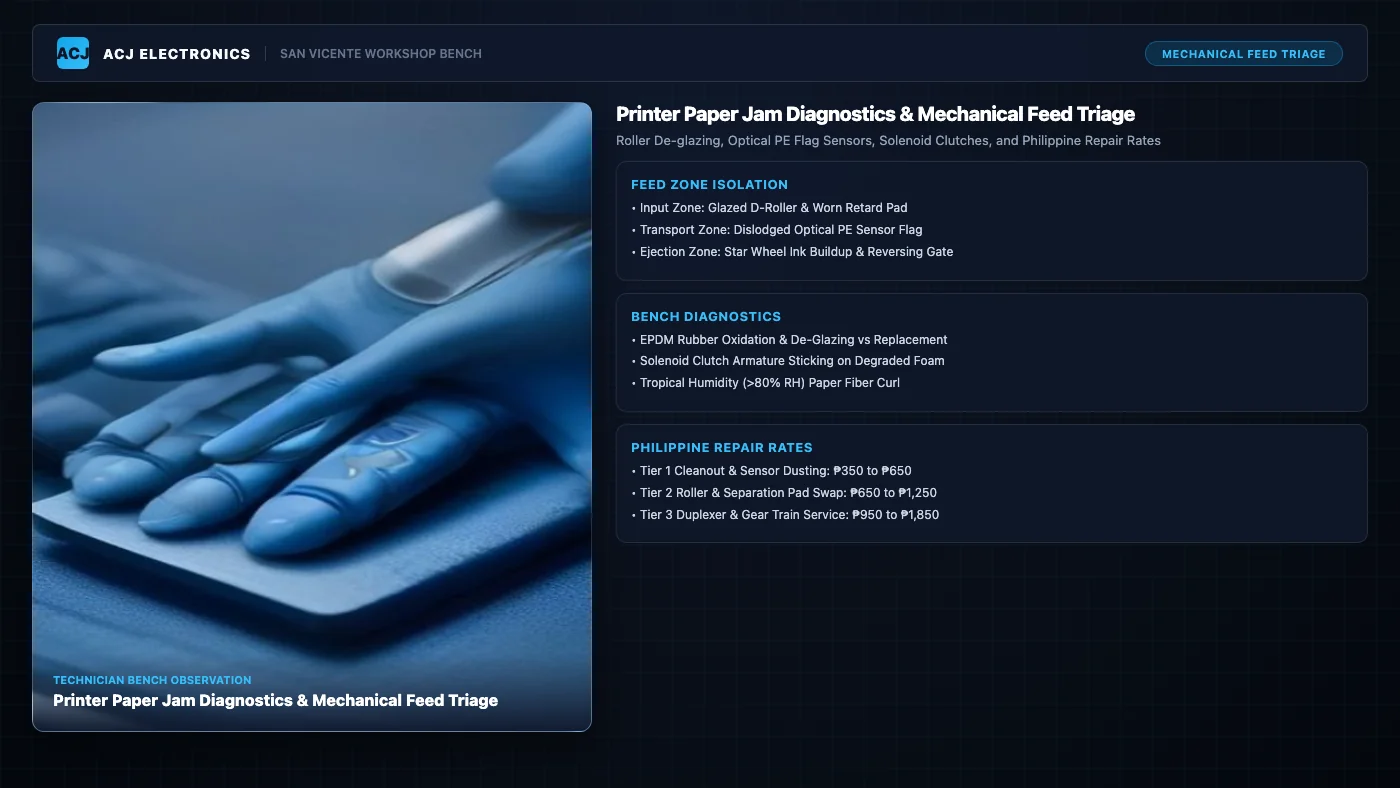
Few office and workshop frustrations compare to a printer halting mid-job with a flashing amber paper jam error. You open every access door, peer into the feed tray with a flashlight, and find nothing. Or worse, a sheet of paper sits mangled into tight accordion folds beneath the platen rollers, stubbornly resisting extraction. Users frequently yank stuck pages in anger, fracturing internal plastic gears and turning an easily cleared mechanical jam into an expensive workshop overhaul.
At our repair facility in Poblacion, San Vicente, Ilocos Sur, printer paper feed failures represent one of our most frequent bench diagnostics under Angelo Carlo A. Jacinto (BS ECE, NC II). Whether handling high-volume ink tank printers like the Epson EcoTank and Canon MegaTank or commercial laser workhorses from Brother and HP, mechanical feed issues follow strict physical rules. Paper transport relies on friction coefficients, mechanical spring balances, and optical timing gates. When any single element degrades, jams occur repeatedly.
The Three Mechanical Paper Feed Zones: Understanding How Paper Moves
To diagnose paper feed failures accurately, you must divide the printer transport path into three distinct physical zones. Each zone uses specialized drive components, pressure rollers, and electronic sensors.
1. The Input Zone: Pick-up D-Roller, Retard Roller, and Separation Pad
The paper path begins at the input cassette or top-loading gravity chute. The heart of this zone is the pick-up roller, typically a D-shaped or cylindrical shaft fitted with a high-friction ethylene propylene diene monomer (EPDM) rubber tire. A mechanical cam or electromagnetic solenoid engages the drive train, rotating the pick-up roller against the top sheet of the paper stack.
Directly beneath or opposite the pick-up roller sits the retard roller or a cork separation pad. This component performs a vital engineering function: sheet separation. The friction coefficient between the rubber pick-up roller and paper is engineered to be higher than the friction between two sheets of paper, while the separation pad friction is higher than sheet-to-sheet friction but lower than roller friction. This friction gradient ensures that exactly one sheet advances into the machine while subsequent sheets are held back.
When the separation pad wears thin or the pick-up roller glazes over, the friction equation collapses. The printer either slips continuously without pulling paper, or drags three to five sheets into the chute at once.
2. The Transport and Registration Zone: Platen Shaft, Star Wheels, and PE Sensors
Once past the separation stage, the sheet enters the transport and registration zone. Here, a steel platen drive roller paired with rubber or plastic pinch rollers grabs the leading edge. In inkjet printers, an array of delicate, sharp-toothed metal star wheels presses the paper flat against the printing platen without smudging wet ink.
This zone also houses the Paper End (PE) and registration optical sensors. Most printers employ photo-interrupter sensors consisting of an infrared light-emitting diode (LED) facing a phototransistor across a narrow plastic slot. A lightweight plastic flag with a micro-torsion spring protrudes into the paper path. As the leading edge passes, it pushes the flag out of the optical slot, allowing infrared light to hit the phototransistor and signalling the mainboard microcontroller that paper has successfully arrived.
If the paper arrives even 150 milliseconds later than the firmware expects, the logic board halts the drive motor and flags a paper jam error to prevent ink from firing directly onto bare plastic.
3. The Ejection and Duplex Zone: Exit Rollers, Reversing Gates, and Fusers
After receiving ink or toner, the printed sheet moves into the ejection zone. In inkjet devices, rubber output delivery rollers pull the page toward the exit tray. In laser printers, the sheet passes through high-temperature fuser heat rollers operating at 180°C to 210°C, melting toner powder into paper cellulose fibers under heavy spring pressure.
Printers equipped with automatic two-sided (duplex) printing feature a mechanical reversing gate or flapper. As the page exits, a solenoid flips the gate downward, and the ejection rollers reverse direction, steering the sheet into a secondary undercarriage return path. Dust, paper lint, or accumulated aerosolized ink overspray in this zone causes the sheet to snag on guide ribs, crumpling paper into an accordion shape right at the output lip.
Root Cause Diagnostics: What Really Triggers Printer Paper Jams
When a customer brings a jamming printer to our bench, we systematically isolate the failure into one of five physical and electrical mechanisms.
1. EPDM Rubber Oxidation, Paper Dust Chalking, and Micro-Cracking
Rubber pick-up rollers do not last indefinitely. With every sheet fed, microscopic cellulose fibers and calcium carbonate paper coatings scrub against the EPDM rubber surface. Over time, this fine mineral powder embeds into the rubber pores, turning the grippy charcoal surface into a smooth, chalky gray finish.
Simultaneously, atmospheric ozone and tropical heat oxidize the polymer chains in the rubber, causing plasticizer migration. The rubber hardens, develops microscopic surface cracks, and loses its elastic grip. When the feed motor rotates the D-roller, the roller simply skids across the top sheet with a characteristic squeak or scratching sound. The printer tries two or three revolutions, fails to advance paper to the PE sensor, and displays an out-of-paper or paper-jam error.
Cleaning rollers with distilled water restores traction temporarily for glazed units. However, once EPDM rubber suffers deep micro-cracking and loss of shore durometer elasticity, complete tire replacement is mandatory.
2. Optical Sensor Failure vs Physical Debris: The Anatomy of Phantom Jams
One of the most perplexing printer faults is the phantom paper jam: the printer screams that paper is stuck, yet the entire feed path is bone dry and empty. When this occurs, the fault almost always resides in the optical photo-interrupter assembly.
There are two primary failure modes:
- Dislodged Torsion Return Spring: The plastic sensor flag relies on a delicate 0.2 mm wire torsion spring to swing back to its resting position once paper exits. When users yank jammed paper backward out of the input tray, the paper edge catches the flag and pulls it in reverse. This backward force slips the spring off its plastic retaining peg. With no spring tension, gravity leaves the flag resting inside the optical slot, continuously blocking infrared light. The logic board assumes paper is permanently present and refuses to boot.
- Paper Dust in the Photo-Interrupter Slot: In dusty workshops and print shops, ambient lint and paper chaff settle directly into the U-shaped optical sensor cavity, blocking the infrared emitter beam from reaching the receiver. Blasting the sensor slot with dry compressed air clears the blockage and restores normal operation instantly.
3. Solenoid Feed Clutch Degradation: Sticky Sound-Damping Foam
Most laser printers and commercial inkjets use a small direct-current electromagnetic solenoid to control when the feed roller shaft turns. When the logic board energizes the solenoid coil, magnetic force pulls a hinged steel armature against the core, releasing a mechanical latch on the pick-up gear.
To eliminate metallic clicking noise, printer manufacturers stick a tiny 1 mm square of open-cell polyurethane foam on the solenoid armature stop. Over five to seven years, this foam degrades into a gummy, semi-liquid adhesive residue. When the solenoid activates, the steel armature sticks to the melted glue and fails to release when electrical power cuts off.
Because the armature sticks open, the pick-up roller continues spinning for multiple full rotations instead of stopping after indexing a single sheet. This causes the printer to feed paper continuously, overlapping two or three sheets inside the registration rollers and causing an instant accordion jam.
4. CISS Ink Tube Tension and Printhead Carriage Binding
In tank printers (Epson EcoTank, Canon MegaTank, HP Smart Tank) and aftermarket Continuous Ink Supply System (CISS) conversions, paper jam errors frequently have nothing to do with paper. The carriage motor drives the printhead assembly back and forth along a polished steel guide rail, monitored by an optical encoder strip reading transparent hash marks.
Flexible silicone ink tubes connect the stationary ink tanks to the moving carriage. If these tubes lose slack, sag into the mechanical chassis, or catch on internal plastic ribs during a print stroke, the carriage motor stalls. The logic board detects excessive back-EMF current on the carriage driver IC and immediately triggers a general service error. On many consumer printer models, the firmware reports this carriage stall as a generic paper jam error, confusing users who search endlessly for missing paper.
5. Tropical Climate Impact: Paper Fiber Swelling and Edge Curling
Environmental conditions in the Philippines play a decisive role in paper feed reliability. In high-humidity regions like Ilocos Sur and throughout Luzon, indoor relative humidity frequently exceeds 80% RH during the monsoon season. Standard wood-pulp office paper (70 to 80 GSM) is highly hygroscopic, absorbing moisture directly from humid air.
Moisture absorption weakens the structural stiffness of the paper and causes the edges to swell unevenly, producing a visible upward curl along the leading edge. When the feed roller pushes this limp, curled sheet forward, the leading edge fails to bridge the gap into the registration chute. Instead, it collides directly with plastic guide ribs or catches on the bottom edge of the printhead nozzle plate, instantly bunching into tight pleats.
Keeping paper reams tightly sealed in their original moisture-barrier wrappers until loading, and fanning sheets before insertion, prevents up to 70% of humidity-induced feed faults.
Safe Jam Extraction Protocols: Preventing Gear and Sensor Damage
How you remove a jammed piece of paper determines whether your printer lives to print another day or requires an immediate bench overhaul. Follow these strict engineering rules whenever a sheet stops:
- Always Pull in the Forward Feed Direction: Pull paper in the direction it normally travels through the printer. If the sheet has entered the platen or exit rollers, pull it forward toward the output tray. Never yank paper backward out of the input tray unless the leading edge has not yet engaged the registration rollers. Backward pulling forces gear teeth against one-way roller clutches, shearing delicate plastic cogs and dislodging sensor flag return springs.
- Use Balanced Two-Handed Tension: Grip the jammed sheet with both hands across its full width. Apply slow, firm, even tension. Yanking quickly tears the paper along fiber grain lines, leaving small 10 mm triangular scraps trapped deep inside inaccessible sensor channels.
- Strictly Zero Metallic Implements: Never insert metal tweezers, screwdrivers, kitchen knives, or paper clips into the paper feed path. Metal tools scratch and gouge soft EPDM rubber rollers, creating permanent flat spots that slip on every subsequent sheet. Furthermore, slipping metal tools against the transparent optical encoder strip or linear carriage scale strips off the microscopic photolithographic timing marks, rendering the printer inoperable. Use non-conductive plastic spudgers or curved ESD-safe nylon tweezers when retrieving loose scraps.
- Power Down Before Reaching Near the Carriage: Always turn off the printer before clearing jams inside the print zone. Moving the carriage by hand while the printer is actively powered can send reverse-voltage back-EMF spikes through the stepper motor coils into the mainboard driver ICs, destroying the board.
Diagnostic Matrix: Printer Feed Symptoms vs Bench Resolutions
Use this diagnostic decision matrix to match your printer feed symptom with its mechanical root cause, workshop test method, and permanent resolution.
| Symptom | Mechanical Root Cause | Bench Test Method | Permanent Resolution |
|---|---|---|---|
| Paper slips at intake, motor spins but sheet never feeds | Glazed, oxidized, or paper-dust chalked EPDM pick-up roller tire | Inspect rubber under 10x loupe; check traction with 80 GSM test cardstock | Clean with distilled water; if oxidized or cracked, replace EPDM pick-up tire |
| Multiple sheets dragged simultaneously into feed chute | Worn cork separation pad, polished retard roller, or sticky feed solenoid | Measure cork pad thickness; inspect solenoid armature for gummy foam residue | Replace separation pad; scrape gummy foam off solenoid and apply Mylar tape |
| Accordion pleat crinkle at platen registration entrance | Foreign debris in feed channel (staple, paper clip) or humid curled paper | Inspect feed throat with high-intensity penlight; test with fresh dry 80 GSM paper | Extract foreign debris with curved forceps; store paper in sealed dehumidified tubs |
| Sheet stops halfway through printing with smudged ink | Transport star wheel spring fatigue or CISS ink tube ribbon snagging chassis | Manually cycle carriage across full sweep; verify star wheel downward spring force | Re-seat star wheel tension springs; dress CISS silicone tubing to eliminate rub |
| Sheet completes printing but binds at output ejection tray | Sticky fuser exit roller, duplexer reversing gate snag, or ink overspray buildup | Inspect output ejection tires and duplex flapper gate hinges for friction | Clean exit rollers; clean ink overspray; lubricate duplexer transfer flapper pivots |
| Phantom paper jam error with zero paper inside machine | Dislodged PE flag torsion spring or paper dust in optical interrupter slot | Check sensor collector voltage with DMM (3.3V unblocked vs 0.15V blocked) | Re-hook flag torsion spring onto chassis anchor; blow out sensor slot with air |
Philippine Commercial Repair Price Matrix: Bench Rates and Turnaround
Repair costs for printer paper feed mechanisms depend on whether the issue requires non-invasive path clearing, component replacement, or board-level electronic diagnostics. Here is our standardized repair price structure at ACJ Electronics in Ilocos Sur:
| Service Tier | Included Diagnostics & Repairs | Standard Philippine Cost | Typical Turnaround |
|---|---|---|---|
| Tier 1: Basic Path Cleanout & Optical Sensor Service | Chassis disassembly, foreign object extraction, paper dust blow-out, optical photo-interrupter dusting, roller de-glazing | ₱350 to ₱650 | 1 to 2 hours |
| Tier 2: Pick-up Roller & Separation Pad Replacement | OEM EPDM pick-up roller tire swap, cork/rubber separation pad renewal, dislodged PE flag torsion spring re-seating | ₱650 to ₱1,250 | 1 to 2 days |
| Tier 3: Duplexer Mechanism & Gear Train Overhaul | Feed clutch solenoid cleaning and Mylar re-cushioning, cracked spur gear replacement, automatic duplexer rebuild | ₱950 to ₱1,850 | 2 to 3 days |
| Tier 4: Logic Board Comparator & Motor Driver IC Service | Component-level micro-soldering, burned stepper motor driver IC replacement, blown F1/F2 surface-mount motherboard fuses | ₱1,500 to ₱2,800 | 3 to 5 days |
For a detailed breakdown of printer maintenance costs, including printhead unclogging and waste ink pad counter resets, explore our printer repair cost guide and visit our comprehensive printer repair hub. For cross-device pricing standards, review our electronics repair pricing hub.
The 50% Economic Repair Feasibility Rule for Printers
Printers present an unusual economic dynamic in electronics repair. Some budget printers are practically disposable, while ink tank workhorses deliver outstanding long-term value. We apply a strict 50% economic repair rule to ensure customers make sound financial decisions:
If the total estimated repair cost exceeds 50% of the price of an equivalent functional replacement printer, replacement is the more sensible path.
Here is how this rule applies across common printer categories in the Philippines:
- Budget Cartridge Inkjets (Retail ₱1,800 to ₱2,800): Budget two-cartridge inkjets (such as the Canon Pixma MG series or HP DeskJet series) have a strict 50% repair ceiling of ₱900 to ₱1,400. If the machine only requires a ₱450 Tier 1 path cleanout or roller cleaning, repair makes economic sense. However, if the paper feed gear assembly has stripped or the pick-up assembly requires total tear-down, repair costs quickly approach ₱1,250. Factoring in expensive replacement ink cartridges, replacing the unit or upgrading to a tank printer is the smarter choice.
- Commercial EcoTank / CISS Workhorses (Retail ₱8,500 to ₱15,000): Continuous ink tank printers (Epson EcoTank L3210, L3250, L5290; Canon MegaTank G2020, G3010; Brother InkBenefit T420W, T720DW; and HP Smart Tank 515) have a generous 50% repair ceiling of ₱4,250 to ₱7,500. Because these machines print tens of thousands of pages for fractions of a centavo per page, repairing worn feed rollers (₱650 to ₱1,250) or fixing dislodged sensor springs (₱450 to ₱750) preserves your significant hardware investment. Repairing saves 75% to 85% compared to purchasing a brand-new printer.
To evaluate repair versus replacement decisions across laptops, phones, and office hardware, consult our repair vs replace hub.
Workshop Case Study: Epson EcoTank L3210 with Phantom Jam at 14,000 Pages
A small business owner from Poblacion, San Vicente brought an Epson EcoTank L3210 all-in-one printer to our workbench. The printer was completely locked out: the orange paper jam indicator and power light were flashing alternately immediately upon powering up. The computer status monitor displayed error code 034004 (Paper Jam Error), yet the rear input tray and front ejection chute were completely empty.
The owner reported that two days earlier, a thick 220 GSM cardstock sheet jammed mid-print. An employee cleared the jam by grabbing the sticking sheet with both hands and yanking it backward out of the top rear tray with considerable force. Immediately afterward, the printer refused to initialize.
Our diagnostic bench procedure followed these steps:
- Housing Disassembly: We disconnected all power, removed the scanner flatbed assembly, and unclipped the main outer chassis to expose the mechanical paper feed path and logic board.
- PE Sensor Flag Inspection: Under stereoscopic magnification, we inspected the Paper End (PE) actuator flag located along the rear paper entry chute. The inspection revealed that the backward pull had dragged the plastic sensor flag backward past its mechanical travel stop. This violent reverse motion dislodged the miniature 0.2 mm wire torsion spring from its molded chassis anchor rib. With no spring force to pull it back, the flag remained stuck in the forward position, permanently interrupting the infrared beam of the optical photo-interrupter.
- Multimeter Circuit Verification: We measured voltage at the photo-interrupter signal pin using a digital multimeter on our ESD bench. The signal line sat stuck at 0.14V (optical dark state, indicating paper present) even with zero paper inserted. We carefully re-hooked the torsion spring onto its anchor post and lubricated the flag pivot with a dry PTFE lubricant. The flag swung freely again, and the signal voltage returned to 3.32V (unblocked open state).
- Pick-up Roller Traction Testing: Because the printer had logged 14,200 lifetime pages on its internal EEPROM counter, we inspected the D-shaped EPDM pick-up roller tire. The rubber showed severe chalking and glazed micro-cracks from paper dust abrasion. To prevent future jams, we unlatched the feed shaft collar and installed a fresh OEM high-traction EPDM rubber tire and renewed the cork retard separation pad.
After reassembly, we performed test feeds using both standard 70 GSM copy paper and heavy 220 GSM photo cardstock. The printer fed 50 consecutive test pages with zero misfeeds, perfect registration alignment, and silent pick-up engagement.
The total repair bill came to ₱750 (₱450 labor for chassis tear-down, sensor spring calibration, and path cleanout + ₱300 for the OEM EPDM pick-up tire). By repairing the printer rather than replacing it, the business owner saved ₱8,750 compared to buying a replacement EcoTank L3210 at current retail (₱9,500).
For hands-on technicians interested in the diagnostic tools and multimeter methods used in our workshop, refer to our comprehensive tools and skills hub.
Professional Printer Diagnostics and Repair in San Vicente, Ilocos Sur
If your office or home printer keeps jamming, grinding gears, pulling multiple sheets, or refusing to clear a phantom paper jam error, avoid forceful pulling that fractures internal drive mechanisms. Bring your printer to our repair facility in Poblacion, San Vicente, Ilocos Sur for precision mechanical and electronic triage.
Under Senior Hardware Diagnostic Engineer Angelo Carlo A. Jacinto (BS ECE, NC II), ACJ Electronics delivers component-level diagnostics, pick-up roller de-glazing and replacement, optical sensor restoration, printhead recovery, and board-level repair across all major printer brands. Contact us today for honest, reliable diagnostic triage.